
Intro
Discover 5 ways to send Outlook invites, streamlining meeting scheduling with calendar sharing, reminders, and notifications, using Outlooks built-in features and integrations.
Sending meeting invitations through Outlook is a common practice in professional settings, making it easier to organize and manage meetings. The ability to send Outlook invites simplifies the process of coordinating schedules and ensuring that all relevant parties are informed about upcoming events. Understanding how to utilize this feature effectively can significantly improve communication and productivity within teams and organizations.
The importance of sending meeting invitations via Outlook lies in its integration with calendar systems, allowing for seamless scheduling and reminders. It helps avoid misunderstandings about meeting times, dates, and locations, and it provides a clear and formal way to invite attendees. Furthermore, Outlook invitations can include additional details such as agendas, meeting objectives, and any necessary preparatory materials, making them a comprehensive tool for meeting organization.
In today's fast-paced business environment, the efficiency of sending and managing meeting invitations is crucial. It not only reflects the professionalism of the meeting organizer but also contributes to the overall productivity of the team. By mastering the different methods of sending Outlook invites, individuals can better manage their time and that of their colleagues, leading to more effective meetings and better outcomes.
Sending Outlook Invites: An Overview
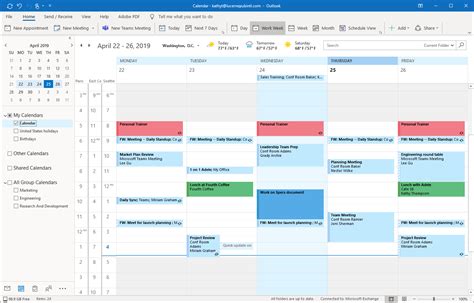
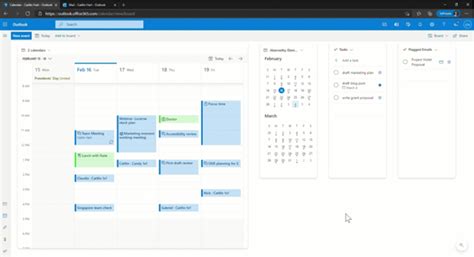
Sending Outlook invites is a straightforward process that can be accomplished in several ways, catering to different preferences and scenarios. Whether you're organizing a small team meeting or a large conference, Outlook provides the necessary tools to ensure that all invitees receive the meeting details promptly and efficiently. The following sections will delve into the specific methods of sending Outlook invitations, highlighting their unique features and benefits.
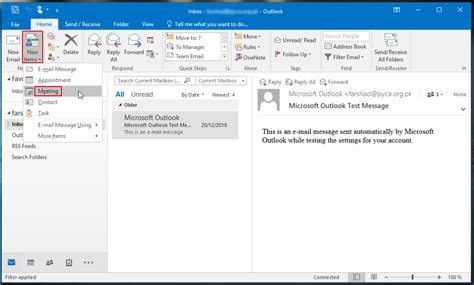
Method 1: Using the Ribbon
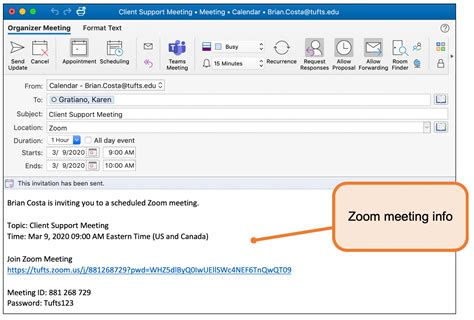
One of the most common methods of sending an Outlook invite is by using the ribbon at the top of the Outlook window. This method is intuitive and provides quick access to the invitation feature. By navigating to the "Home" tab and clicking on "New Meeting," users can initiate the process of creating and sending a meeting invitation. This approach allows for the inclusion of all essential meeting details, such as the subject, location, start and end times, and a list of invitees.Creating and Sending Invitations

When creating a meeting invitation, it's essential to ensure that all critical information is included. This encompasses not only the basic details like date, time, and location but also any relevant attachments or notes that attendees should be aware of. Outlook's interface is designed to guide users through this process, making it easy to add invitees, set reminders, and specify the meeting's duration and frequency if it's a recurring event.
Method 2: Drag and Drop
Another convenient method for sending Outlook invites involves the drag-and-drop feature. By dragging an email or a contact from the inbox or contacts list to the calendar button in the navigation pane, users can quickly create a meeting invitation. This method is particularly useful for turning an email conversation into a meeting invitation, streamlining the process of moving from discussion to action.Utilizing Drag and Drop for Invitations

The drag-and-drop method exemplifies Outlook's flexibility and user-centric design. It recognizes that users often engage with their inbox and calendar simultaneously, and by integrating these components, it facilitates a smoother workflow. This feature is especially beneficial for those who prefer a more tactile approach to managing their meetings and communications.
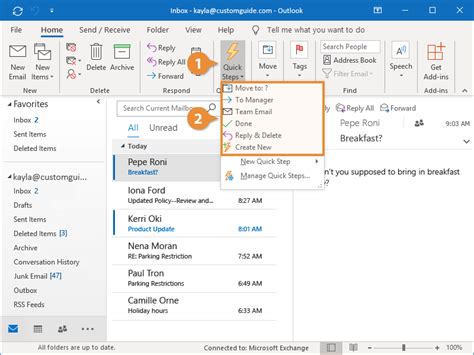
Method 3: Using Quick Steps
For users who frequently send meeting invitations to the same group of people, Outlook's Quick Steps feature can be a significant time-saver. Quick Steps allow users to automate repetitive tasks, including sending meeting invitations. By creating a custom Quick Step for meeting invitations, users can simplify the process to just a few clicks, making it ideal for regular team meetings or recurring events.Automating Invitations with Quick Steps
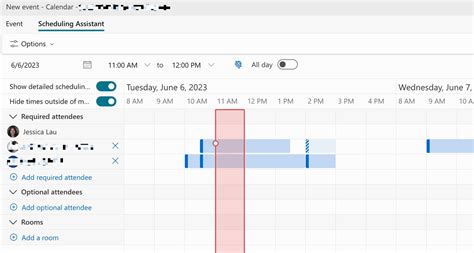
Method 4: Scheduling Assistant
The Scheduling Assistant in Outlook is a powerful tool for finding the best time for a meeting based on the attendees' availability. This feature is particularly useful when organizing meetings with multiple participants, as it helps avoid conflicts and ensures that all invitees can attend. By proposing a meeting time that works for everyone, the Scheduling Assistant streamlines the meeting planning process, reducing the back-and-forth typically involved in finding a mutually convenient time.Efficient Meeting Scheduling

The Scheduling Assistant is a testament to Outlook's focus on facilitating collaboration and productivity. Its ability to analyze the calendars of potential attendees and suggest optimal meeting times makes it an indispensable tool for any professional looking to maximize the efficiency of their meetings.
Method 5: Mobile App
For those who are often on the go, the Outlook mobile app provides a convenient way to send meeting invitations from anywhere. The app retains the core functionality of the desktop version, including the ability to create and send meeting invitations. This mobility is crucial in today's fast-paced business world, where the ability to respond quickly to changes in schedules or to initiate meetings at short notice can be a significant advantage.Sending Invitations on the Go

The Outlook mobile app underscores the importance of accessibility and flexibility in modern productivity tools. By enabling users to manage their meetings and invitations from their mobile devices, it ensures that they remain connected and productive, regardless of their location.
Outlook Invitation Image Gallery


How do I send a meeting invitation in Outlook?
+To send a meeting invitation in Outlook, navigate to the calendar, click on "New Meeting," add the required details such as subject, location, and time, and then add the invitees before sending the invitation.
Can I schedule recurring meetings in Outlook?
+Yes, Outlook allows you to schedule recurring meetings. When creating a new meeting invitation, you can specify the recurrence pattern, such as daily, weekly, or monthly, and set an end date for the recurrence.
How do I use the Scheduling Assistant in Outlook?
+The Scheduling Assistant can be accessed when creating a new meeting invitation. It helps find the best time for a meeting based on the attendees' availability. To use it, add the invitees and then click on the "Scheduling Assistant" button to view a grid showing each attendee's availability.
Incorporating Outlook into your daily workflow can significantly enhance your productivity and meeting management capabilities. By mastering the various methods of sending Outlook invites, you can streamline your communication, ensure that meetings are well-organized, and make the most out of your time. Whether you're a seasoned professional or just starting to explore the features of Outlook, understanding how to effectively send and manage meeting invitations is a crucial skill that can benefit your professional and personal life. So, take the first step today, and discover how Outlook can transform the way you work and collaborate with others.